Why Your DIY Tool Keeps Loosening and How to Stop It
If a homemade tool keeps loosening, that is not a random annoyance. It usually means the joint, fastener, material, or load path is not working as a system. DIY tools loosen faster than furniture because they see vibration, shock, repeated adjustment, side load, and quick handling. A fence on a jig, a handle on a wooden tool head, or a mounted shop accessory may feel solid on day one and still begin to move after a few sessions.

The real fix is not just tightening harder. You have to understand why your DIY tool keeps loosening, then change the joint so it can survive the actual use pattern.
Why DIY Tools Loosen in the First Place
Several things can cause a loose DIY tool, and they often happen together.

Vibration and impact
A handheld tool, shop fixture, or machine-mounted accessory sees repeated vibration. Even small vibration can slowly walk a screw loose, especially if the fastener is lightly loaded but constantly shaken.
Wood compression under fasteners
Wood is not rigid under a screw head or washer. It compresses over time, especially if the fastener was over-tightened at first. That creates a gap, and the joint relaxes.
Thread back-off
If the joint is subjected to repeated motion or reversing force, threads can unwind. This is common where a tool gets bumped, twisted, or adjusted often.
Poor pilot holes and weak bearing
A screw driven without a proper pilot hole may split fibers or crush them instead of cutting cleanly. That gives you a joint that feels tight but has little real grip.
End grain and leverage
Fasteners in end grain are often weak because the fibers do not hold threads as well. Add leverage from a long handle, fence arm, or offset mount, and a small movement at the fastener becomes a larger movement at the working end.
Seasonal movement and creep
Wood swells and shrinks with humidity. A fit that seems correct in one season can loosen later as the material moves. Under sustained load, wood also creeps slightly, which is enough to change alignment in a jig or fixture.
How to Identify the Real Source of the Problem
Before repairing anything, find out what is actually moving.
Is the fastener loose, or is the wood crushed?
If the screw turns freely, the issue may be thread engagement. If the screw is still tight but the part wiggles, the wood around it may be compressed or enlarged.

Is the part rotating, slipping, flexing, or shifting?
These are different failures. Rotation usually points to inadequate anti-rotation geometry. Slipping often means poor clamping force or a slick interface. Flexing points to a weak part or too much leverage. Shifting can mean the whole assembly is moving under load.
Are the holes worn out?
Oval holes, fuzzy fibers, or visible gaps around screws are signs that the hole pattern has been damaged. In that case, more tightening is usually the wrong response.
Is it a fastening problem or an alignment problem?
Some “loosening” is really misalignment. If the part is forced slightly out of square every time it is tightened, it will seem loose later because the real load is trying to move it back.
Fastener Problems That Cause Loosening
Fastener choice matters more than many builders expect.
Wood screws, machine screws, and bolts
Wood screws depend on thread bite in the material. Machine screws need threads in a nut, insert, or tapped metal. Bolts with nuts or inserts are usually better when a part is adjusted often or sees vibration.
Thread engagement length
A short thread engagement can hold briefly and fail later. Too little purchase is one of the most common fastener problems in workshop repair.
Coarse versus fine threads
Coarse threads bite better in wood. Fine threads can be useful in metal hardware, but they are not automatically better in a wooden tool unless the structure supports them.
Head style and bearing area
A small head can pull into wood and crush fibers. Washer heads or larger bearing surfaces distribute force better and reduce loosening from wood compression.
Overdriving
Driving a screw too hard can strip the hole, crush the surrounding wood, or damage the drive recess. Once that happens, the screw can no longer maintain clamp force.
Cheap fasteners fail first
Low-quality screws and bolts often have poor threads, weak drives, or inconsistent dimensions. In moving tools, those weaknesses show up early because the hardware is being asked to hold against repeated motion.
Material Movement and Fit
The material itself may be the real source of looseness.
Wood movement is not optional
Wood expands and contracts with humidity. If a joint depends on a perfect friction fit alone, it will change over time.
Softwood versus hardwood
Softwoods crush more easily under hardware. Hardwoods usually hold fasteners better, but they still move and can still wear out around repeated attachment points.
Oversized holes and wobble
A hole that is even slightly oversized can allow movement under load. That movement grows with use until the tool feels sloppy.
Day-one tightness can be misleading
A part can feel perfect when newly assembled and still fail after the wood relaxes, fibers compress, or moisture changes. That is why loose screws often appear after the tool has already “worked fine” for a while.
Reinforcing the Joint Instead of Just Tightening It
If the joint is failing structurally, tightening is only a temporary patch.

Add bearing surface
Washers, large fender washers, or a backing plate spread the load and reduce crushing.
Switch to through-bolts
If the part is important and accessible from both sides, a through-bolt with a nut is often more durable than a screw in wood.
Use thread inserts
Threaded inserts let you assemble and disassemble without destroying the wood fibers each time.
Add secondary support
A second fastener, a locating pin, a shoulder, or a registration surface can reduce leverage on the main screw and stop tools from loosening as fast.
Repair worn holes properly
If holes are already enlarged, re-drill, plug with hardwood, and re-cut the hole. Do not just drive a larger screw into damaged fibers and expect a lasting fix.
Preventing Screws and Bolts from Working Loose
Anti-loosening hardware helps, but only when used correctly.
Lock washers
Useful in some cases, but not a cure-all. In soft wood, the washer can still sink in and lose effectiveness.
Nylon lock nuts
Good when a bolt and nut are used and the joint needs resistance to vibration.
Threadlocker
Useful on metal-to-metal threads. It is less helpful if the wood itself is moving or crushing, because the problem is not only the thread.
Double-nutting and prevailing-torque hardware
These work well in shop hardware assemblies where serviceability matters.
Proper torque
Tight enough to clamp, not so tight that the material is crushed. Over-tightening is one of the fastest ways to create future looseness.
Woodworking-Specific Fixes
Wood tools need wood-specific repair logic.
Plug and re-drill
If a fence mount or handle hole is worn, plug the hole with hardwood, let it cure, then drill a fresh hole in sound material.
Use dowel reinforcement
Dowels can restore alignment and increase shear resistance in a loose joint, especially where a handle or stop sees side load.
Add hardwood inserts or cheeks
A stressed neck, fence arm, or tool head can often be strengthened by adding hardwood faces that widen the load path.
Move fasteners away from end grain
Fasteners placed too close to end grain or edges are more likely to split or loosen.
Glue and clamp before re-fastening
If a joint has opened, glue alone is usually not enough, but glue plus clamping plus properly placed fasteners can restore the connection.
Vibration, Shock, and Repeated Use
Tools loosen differently from static furniture because they move.
A hand tool handle gets tapped, twisted, and cycled. A jig fence gets bumped and adjusted. A machine accessory vibrates every time the tool runs. That repeated action changes the failure rate dramatically.
A part used daily needs a stronger retention strategy than a part used occasionally. If the tool is constantly handled, the joint should be designed for repetitive movement, not just static holding.
Designing So It Won’t Loosen Again
The best fix is often a design change.
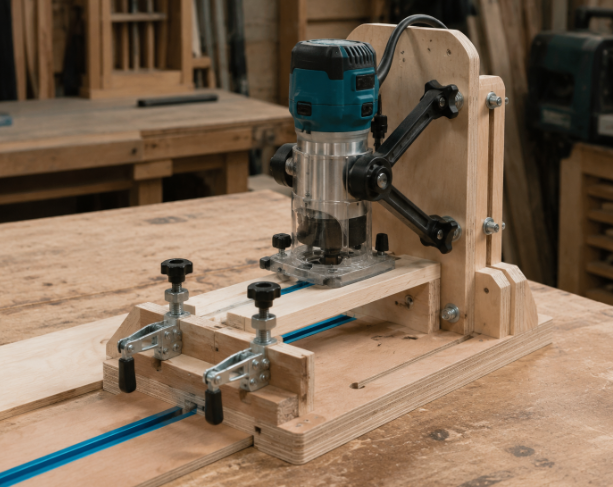
Reduce leverage
Shorten the unsupported span and move the fastener closer to the load path.
Add registration surfaces
Interlocking shapes, shoulders, rabbets, or stop faces reduce dependence on screw friction alone.
Increase contact area
More surface area means less crushing and less movement.
Design for serviceability
Use hardware that can be retightened without damaging the part.
Avoid one-point attachment
A single fastener under load is asking for movement. Two points, or one fastener plus a locating feature, is much better.
Common Mistakes That Make Loosening Worse
A few errors show up again and again.
Overtightening crushes the material. Skipping pilot holes weakens the hole. Relying on glue alone in a dynamic joint is risky. Ignoring enlarged holes guarantees repeat failure. Using the wrong thread type creates poor engagement. Placing fasteners too close to edges invites splitting. And trying to solve movement with more force instead of better fit usually makes the problem worse.
The load direction also matters. If the joint is being pried apart or twisted, more torque on the screw will not fix the design.
When to Replace the Joint or Part
Sometimes repair is not the right move.
If the hole pattern is too damaged, the part is cracked, or the design is structurally weak by nature, rebuilding is faster and safer. This is especially true for precision tools where alignment matters. If a repair would be bulkier, weaker, or harder to service than the original part, start over.
Replacing a bad part is not failure. It is often the practical workshop decision.
Practical Examples
Loose fence on a homemade saw jig
The fence shifts because the fasteners are holding alignment, not resisting side load. The fix is usually a registration edge, backing plate, and through-bolts or inserts.
Handle backing out of a wooden tool head
The hole may be crushed, oversized, or too shallow. A proper repair might include plugging, re-drilling, and adding a cross-pin or wedged fit depending on the tool.
Workbench accessory with vibrating screws
If the hardware loosens under machine vibration, use better thread engagement, a lock nut or insert, and a larger bearing surface.
Clamp face shifting after repeated use
That usually points to compressed fibers or a worn mounting hole. Rebuild the mounting point instead of tightening harder.
Tool mount in a humid shop
Humidity can loosen wood fit and weaken friction-based joints. A bolt-and-insert system, with a backing plate, is usually more stable than a direct screw into wood.
Maintenance Habits That Prevent Repeat Loosening
Check hardware after the first few uses. That initial break-in period often reveals the real weak points. Inspect joints periodically, especially on tools used daily. Keep dust out of threads and contact surfaces. Retighten at a schedule before the joint starts to wander. Replace worn fasteners before they fail in use.
The goal is to catch movement early, not after the hole is damaged.
Conclusion
DIY tools loosen because of load, movement, material behavior, or weak fastening strategy. The real fix is not simply to tighten more. You need to improve the joint, the hardware, and the design together.
To stop tools from loosening, identify where the movement starts, choose a retention method matched to the material and load, and rebuild the connection so it resists both vibration and repeated use. That is what turns a loose DIY tool into one that stays solid in real workshop work.